Introduction
Recently, a client sent a note to VTA Support with the following challenge that Copy Class would solve:
“I want to provide credit to a large amount of existing employees. What can I do to provide credit for a CBT type module with a master list?”
Instead of having a large group of employees go online to take several modules, the organization covered five topics in a full-day, live classroom session and didn’t want people to show due for, or be forced to complete, the online training in VTA Learner.
Because this training was done live, rather than online, and all tests and evaluations were done during the full day of training, the standard post-class Lessons, such as student testing, supervisor checklists or class evaluations, normally completed online, are not needed.
This is a great use for VTA Copy Class!
The Steps
To accomplish this:
-
- Create your first History Session (select the course and set the Start and End Dates as needed).
- Delete all Lessons for that session (otherwise, the Students would need to complete the Course’s default Required Lessons).
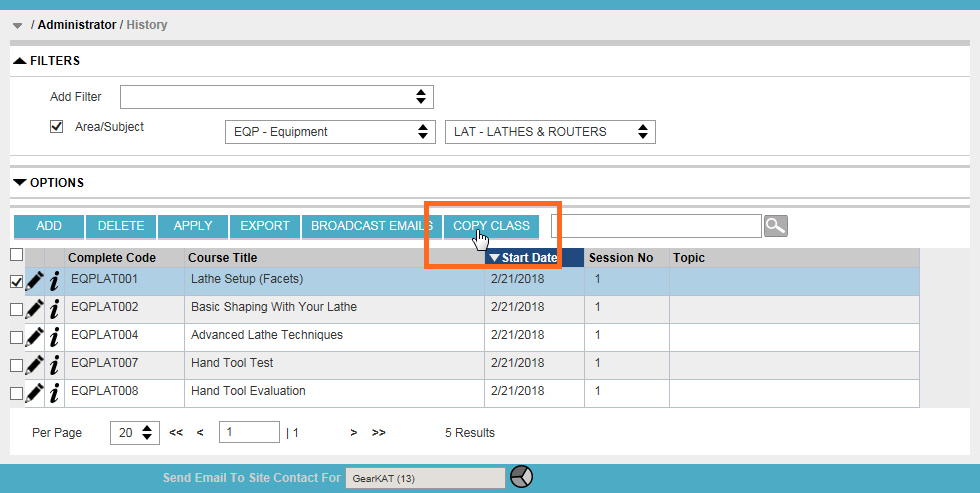
- Add the Students to the Roster and close the session.
- From the grid, with that session selected, start the Copy Class feature.
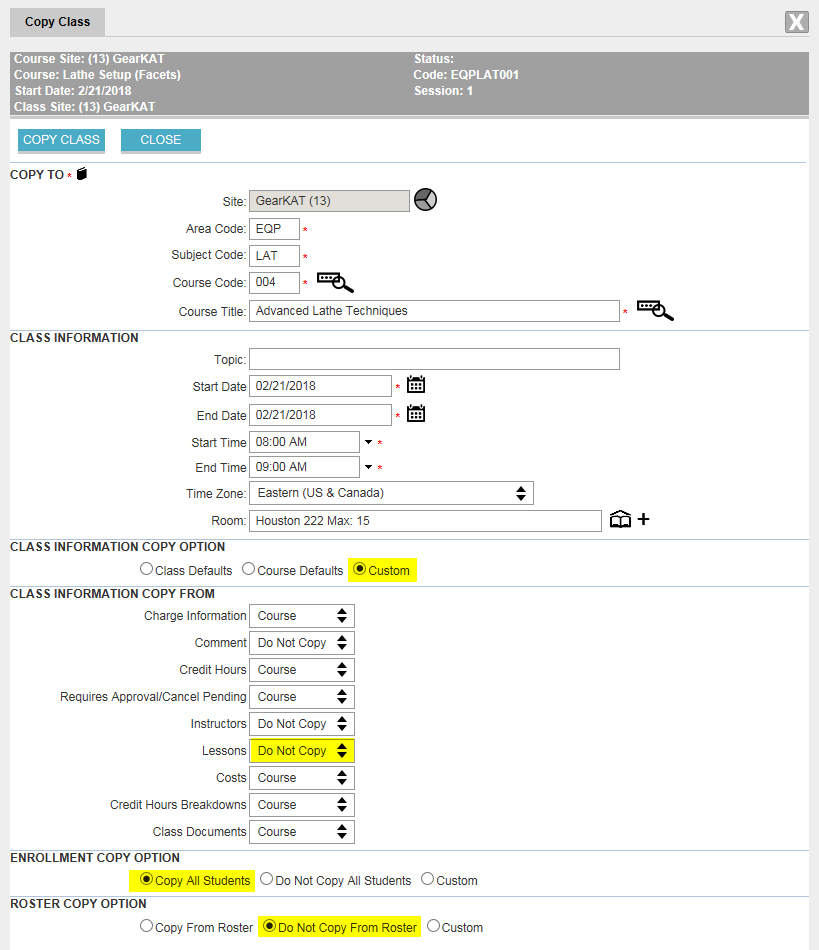
- On the Copy Class form:
- Change Course Title (update Dates and Times as needed).
- In the Class Information Copy Option section, select “Custom”.
- Set the Lessons option to “Do Not Copy” (otherwise, the default Required Lessons for the newly selected Course would be included in your new sessions – and you don’t want that).
- In the Enrollment Copy Option section, select “Copy All Students”.
- In the Roster Information Copy From section, select “Custom” (this step is only truly necessary if you have varied Completion Dates for your Students on their Roster record; if everyone will have the same Completion Date, you can leave the default “Do Not Copy From Roster” selected).
- Set the Completion Date option to “Class Roster”.
- Click the Copy Class button (you will receive a confirmation about the copied Students).
- Click Close (which returns you to the Copy Class form).
- Change the Course Title for the next Course you want to give credit for (update Dates and Times as needed).
- Since your other options would remain the same, click Copy Class.
- Click Close (which returns you to the Copy Class form).
- Repeat until all sessions that you want to credit the Students for have been created and the click Close on the Copy Class form.
The Video
If the steps above seem daunting, check out this short video that demonstrates exactly how to accomplish that in a matter of minutes.
In it, the History session for the first course that students were credited for was used to create additional sessions for the remaining courses and credit the same student roster.
Once the students are on the Roster for the additional sessions, they have full credit for those additional courses with no further action needed on their part!
Want a video created to answer your LMS challenges? Email me at marcl@RISC-inc.com.
