This is part 3 of a three-part article on the new grids in v6.3. For an overview of new grid features see Part 1 of this article.
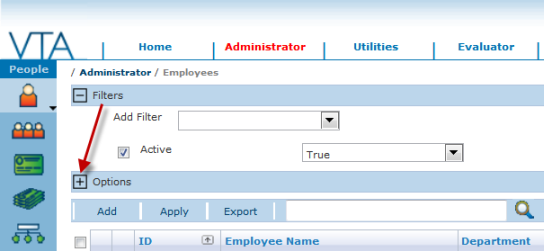
A new Options section has been added to many of the main data grids in this system. The Options section allows you to control the fields that are displayed on the grid and in the tooltip. Obviously, for data entities like Charge Group, Course Media and Standard Code that have only one field the Options section is not needed. However, for larger data entities like Employees, Courses, History and Schedule, the Options section was added to allow you to customize the grid columns and tool tips to fit your specific needs.
Options Basics
To open the Options section, simply click on the + to the left of the Options label. Once opened, there will be a – to the left of the Options label. To close the Options section, just click on the – to the left of the Options label.
The Options section contains two sets of mover boxes – Grid Columns and Tooltip Fields. The Grid Columns boxes control the fields and order in which those fields are displayed on the grid. The Tooltip Fields boxes control the fields and the order in which those fields are displayed in the tooltip that is shown when you hover over the browse icon beside any record.
Each set of mover boxes has an Available box and Selected box. You move fields from the Available box to the Selected box by clicking on a field name using the right and left arrows between the boxes. You change the display order of the Selected fields by clicking on a field name in the Selected list and using the up and down arrows to the right of the Selected box to move the field in the list.
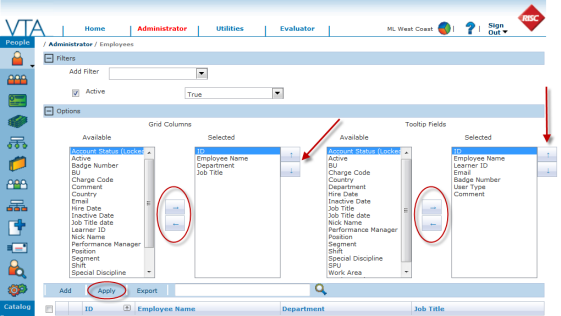
The Options section works just like the Filters section, in that your settings are applied to the grid as soon as click the Apply button. Also, like Filter settings, your Options settings are saved when you click Apply and those settings are “remembered” the next time you return to the grid.
Options Benefits
In previous versions of VTA Backoffice, the columns that were displayed on each grid were set in the application and you had no way to change them. Over the years, different customers have mentioned the fact that they would like to see different fields displayed, but everyone had different suggestions as to what fields should be displayed on each grid. With this functionality, we figured out a way to please everyone. You have the control and you can change your mind and your settings as often as you like.
We introduced tooltips in version 6.0 as way to display some additional information not already shown on the grid. The intention with tooltips is that you can hover over the icon and get additional record information without having to take the time to open the record in browse or edit mode. Tooltips are just a faster way for you to look up information stored in the records. However, like the grid columns, the fields we chose to display in the tooltips weren’t always the ones that everyone needed to see. So, we decided to let you customize those too.
To take full advantage of this functionality in v6.3, start off by going to the grids you tend to access most. Think about the fields that would be the best to add to the grid. These will be the ones that you would use most for sorting and searching. Select those fields as grid columns. Then, think about any other fields that you might have to lookup on a regular basis. This might be something like charge code on employees. Select those kinds of fields as tooltip columns. Remember to click the Apply button to apply the settings to the grid.
For more on using filters on the new grids, see Part 2 of this article.
Mr. Welder’s career is founded in traditional instructional design and computer-based training development. He is a certified Development Dimensions International facilitator, a Kirkpatrick Certified Evaluator and facilitator of the Ohio State University curriculum development program. In addition to working in industry, Mr. Welder has held adjunct faculty positions at Bowling Green State University, Ohio and the College of the Mainland, Texas. Mr. Welder has been published in both Training Magazine as well as US Business Review.