Introduction to Learner Dashboards
RISC will introduce dashboards to Learner in version 7.1. This is the first in a series of blog articles on dashboards. In this article, we cover the basics of how to use the new dashboard features.
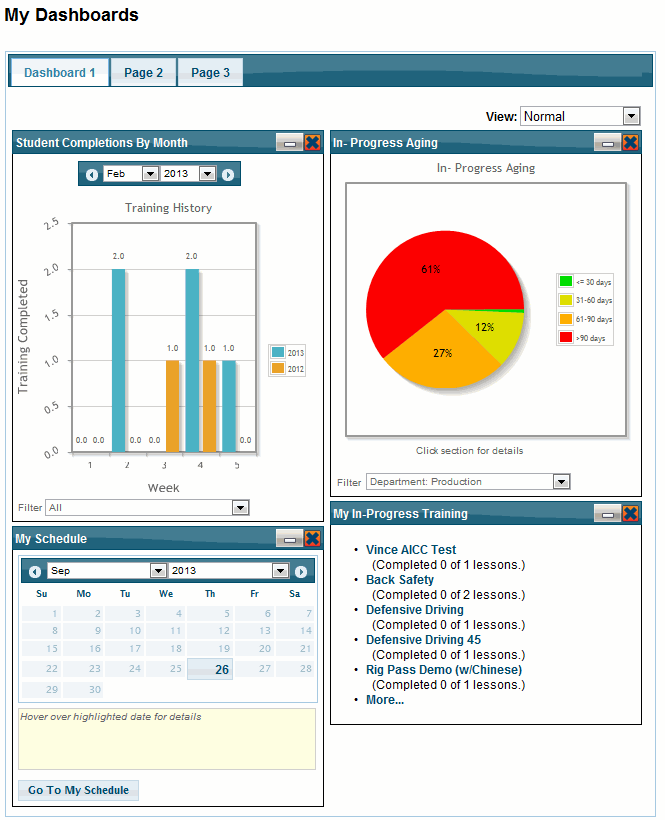
Dashboard Pages
Dashboards are accessed from the My Dashboards option of My Learner. Learner 7.1 will provide multiple pages for dashboard “widgets”. As of this writing we have not decided on the exact number of pages, but 3-5 pages is likely.
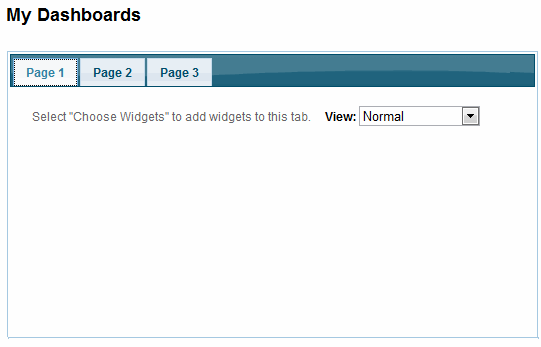
Adding Widgets
In the “View” drop-down, select “Choose Widgets”. On the right hand side of the page you will see the “Catalog” of widgets. There are two widget classifications:
- Student Widgets
This type of widget shows only data related to the user, as a student. - Supervisor Widgets
This type of widget shows aggregated data for students that you supervise. You must have “Can Report” authority as the supervisor in VTA in order to have the student included in on your dashboard.
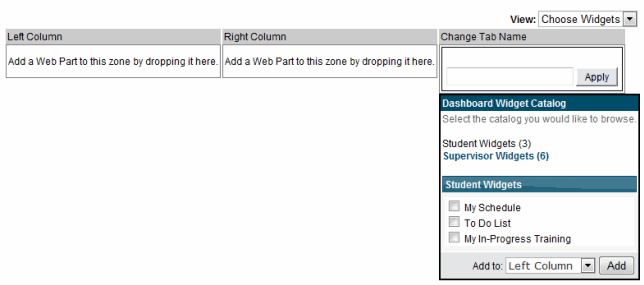
To add a widget to the page:
- Check the box next to the desired widget.
- Select either the Left or Right column from the “Add To” list.
- Click the Add button.
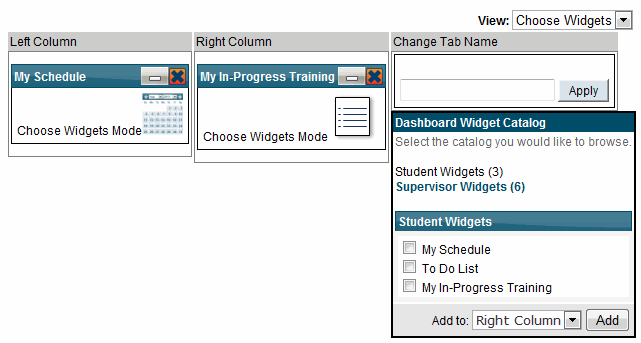
You may have up to 4 widgets per page. Each widget may appear on a tab only once; but you can use the same widget on more than one tab. To display your widgets, change the View drop-down to “Normal”.
Name Your Tabs
You can apply custom names to your tabs. In either “Choose Widgets” or “Edit Layout” view mode, there is a Change Tab Name box. Type the desired name for the tab and click Apply.

Arrange Widgets
You can re-arrange your widgets by choosing Edit Layout from the View drop-down list.
Internet Explorer
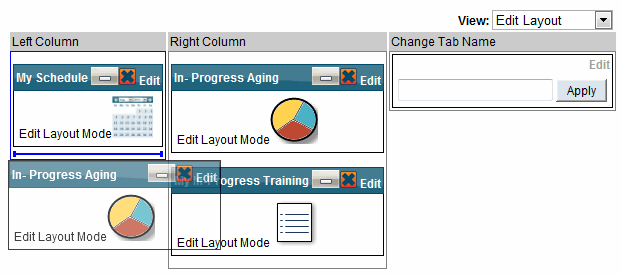
If you are using Microsoft Internet Explorer, you can simply drag and drop widgets to position them. In the example below, I am dragging a widget from the top of the right column to the bottom of the left column.
Other Browsers
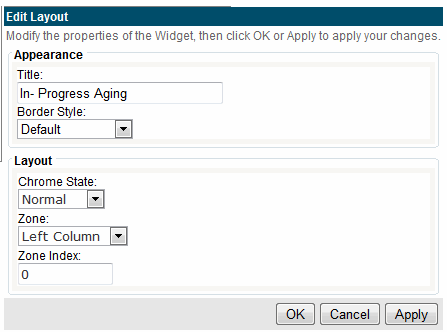
If you are not using Internet Explorer, you can still re-arrange widgets. To do so, while in the Edit Layout view, click the Edit link in the header of the widget. In the Layout section, you can then enter the column and index (0 is top widget in a column) to move the widget. Click “Apply” to save your changes.
Changing Widget Appearance
You can change the Title and the border style of your widgets. To do so, first go to the Edit Layout view. On the widget you wish to change, click the Edit link in the widget header. In the Appearance section, you can change the widget Title and the border style. Be sure and click the Apply button at the bottom of the Edit Layout window to save your changes.

We plan to have 8-10 widgets completed for version 7.1. Future blog articles will cover individual dashboard widgets.
